

I love researching how to “do something,” especially when I’m bored at work, so of course when I decided to make a trailer for The Cycle of the Six Moons, I searched all over Google for various ideas. I wanted to document my process in case it might help someone else, so here it is!
I wanted to keep the trailer in the style of the book covers, using silhouettes, which made this whole process a lot faster.
1. Write a script.
Like with many visual productions, the first step is to write the script! You don’t necessarily want to read directly from what’s written on the back of the book. Sometimes book synopses are a little too detailed, and long sentences might lose the attention of viewers, and you don’t want that.
My goal was to make the trailer less than a minute, and I was cutting it close :O I knew I wanted the text to appear along with the video, so I separated the lines like so:
I’m just a normal girl
…who happens to be the reincarnated Goddess of another world.My return has awakened the Cycle of the Six Moons.
What does that mean?Punishment.
Each month, a trial more devastating than the last
will lead to the death of the universe.Powerful blood must be spilled to end the Cycle…
Blood that runs through only my veins
and the prince destined to fall in love with me.Our enemies want our blood to resurrect their fallen god.
Our friends will risk everything
their lives, families, identities,
to ensure that we will survive to sacrifice ourselves.The Cycle of the Six Moons by Adelle Yeung
It’ll be an adventure. You’ll see!
2. Make a storyboard.
I almost skipped this step, then I realized how insanely valuable it would be to illustrate my ideas before I wasted too much time figuring it out in the programs. It doesn’t need to be a work of art. You can even draw stick figures in place, as long as it gets your ideas across. You’ll probably end up changing things along the way, anyway, but it’ll definitely help you figure out what will work!Here’s mine!

You’ll notice I changed quite a bit.
I thought #1 was too boring, and the head rotation wasn’t working out as smoothly as I liked. Redrawing Michelle in the fetal position was the last silhouette I had made for the trailer, and I put her in at the end.
For #2, I ended up tracing some artwork I already had, but changing Saei so she would be pointing at Michelle.
#3 is pretty much the same, only it looks more interesting at a different angle, and I didn’t necessarily add fancy flashing lights.
The only thing I really kept for #4 was the Dark Mist and the Black Hole.
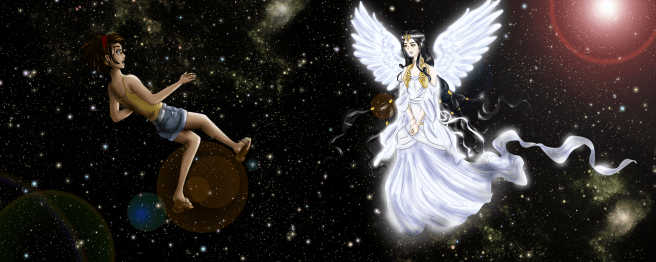
#5 came out awesomely, I just changed Michelle from one side to the other, ’cause I felt she was facing the right in profile too much, so I wanted to switch things up.
#6 is also pretty similar, but a friend suggested that he should raise her hands instead of a static image, so I did that.
#7 is pretty much the same, only I made him grow on-screen, and even though if the end result was a little choppy, I like how it came out.
#8 was changed to profile, and I took Michelle and Jayse out.
#9…ahahaha.
#10 I almost kept it the way it was in the storyboard, but I felt like it was too boring, and I wanted to create something dynamic.
#11 and #12 turned out pretty cool and similar to the storyboard 😀
3. Gather materials.
This is what I gathered:
- Editing software
- Audacity: To record the voice-over.
- Photoshop: To create the images.
- Premiere: To edit the images to the narration.
- After Effects: To add text and cool effects.
- Still images
I made these and worked on each “scene” from the storyboard as I progressed 😀 I made 133 images, which really isn’t a lot for over 3000 frames. - Video
Not applicable in my own case, but some people might like to use live-action shots. - Audio
- Voice-over: I’m already a voice actor, so this part was easy.
- Music: Please, please, please use royalty-free music.
4. Edit the video.
I actually wanted to do most of the trailer in Flash. Alas, Flash gave me a plethora of problems, such as .png files being way too small when I put it on the stage, and then when I resized them, they looked pixelated, because of some silly “images have to have a resolution of 72 otherwise they’ll be small on the stage and when you resize them, they’ll look pixelated” rule.So, perhaps to the disappointment of my buddy Adam, I decided to do everything in Premiere.
Okay, I was a total NOOB at Premiere and After Effects when I started. I couldn’t even figure out how to delete a layer in After Effects until I looked it up. But, once I got used to their interface, it was smooth sailing from there 😀 (Though the style of my trailer is really simple, and there’s a whole world of untouched effects, and I have no idea what my potential is.)
This is a screenshot of the CSM trailer in Premiere:

I put my audio into Premiere and started making up titles in time with my narration. After a few renders, I realized that the Premiere text renders fuzzy, so I later ended up redoing everything in After Effects, and it looks much cleaner.
This is how boring and plain it was when I first started. I ended up repositioning the text, too.
I had a background layer, a silhouettes layer, and then I kept adding layers that it didn’t matter what they were named anymore.
So, the most important thing in the making of the trailer is this: tweening. TWEENING IS AMAZING. What is tweening?

Tweening is basically the smooth movement between one keyframe and another. In the scene shown above, I used it for Michelle bouncing up and down in midair before she falls. You can see a few lines down from the “Position” keyframes the “Rotation” tweening, which I used for when gravity sets back and she falls from the sky.
The following is probably the most complex tweening I did throughout the whole video.

I had started to do it frame-by-frame by using the following images…

But it made it too choppy and I figured I could spend extra time to make the animation smooth.
So what I did then was separate the elements into their own files…

And move these pieces as necessary for a smooth hand-raising motion. The pieces are saved such that when assembled, they create the following image:

I rotated and repositioned the pieces all around so it started in the lower position and ended in the final position. It made a bit of a mess on my Premiere workspace, but I think it was worth it.
For the few instances of actual frame-by-frame animation, I used cross-fades between each frame.
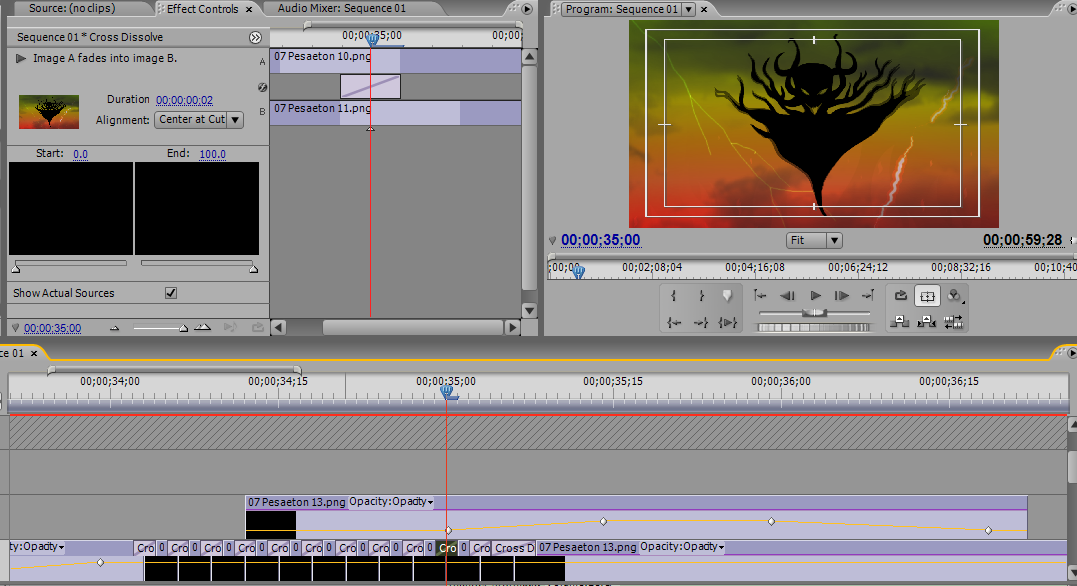
If you look closely at the preview, you’ll see that the tendril-shadows blend into the next image. It’s an easier way to cheat a smoother animation.
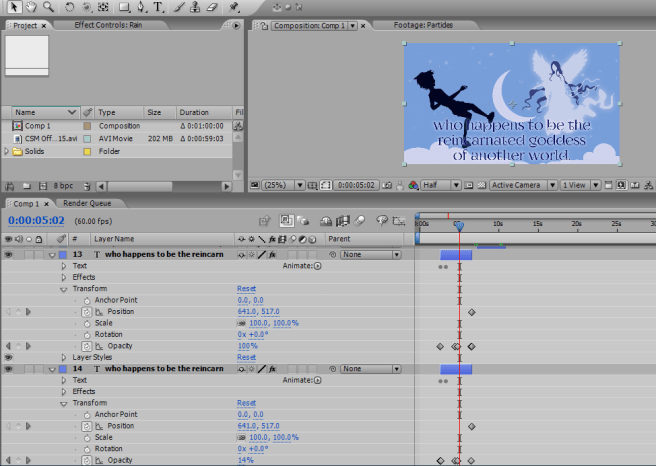
Here’s a screenshot of my workspace in After Effects:

And zoomed in a little to the properties of this text layer, to show the keyframes of changing text color. What I did was duplicate the track, change the color on the top layer, and change the opacity with keyframes so the color will change when the sky changes.
For many of these things, I had to stop every few minutes to look up a tutorial for what I wanted to accomplish >_<
5. Collaborating with Others
I’ll share some of my experience collaborating with other artists 😀 Not everyone is as fortunate enough to work with their own cover artist or composer, so feel free to ignore this step.
My composer for the trailer is Johnathan Johnson of Project Trinity. You can check out his tumblr here and/or his SoundCloud here. I sent him some sample music and wrote him this as a guideline: “I want it to start off whimsical, then BAM, and then ominous, then epic, with a nice sorta feel-good flourish at the end.” And he went with it 😀 He sent me some WIPs along the way, and I gave some feedback, and he carried on.
Of course, I continued with Brandon Lacey as my cover artist. Check out his DeviantArt here 😀 Business with him was as usual. I told him what I wanted, and he he improved upon it.
Without further ado, the final trailer!
Anyway, that’s pretty much it 😀 Of course, there are many ways to make a book trailer, as there are many ways to write a book. I just wanted to show my process.
This wasn’t totally in-depth, so if anyone has any questions about any of the steps in particular, feel free to ask!
